How to Vibe Code a Game
A beginner’s guide to building something fun by feel, not fear.
🎧 The Spirit of Vibe Coding
Vibe coding isn’t a framework or a strict philosophy. It’s more like a state of mind, a way to create that leans on instinct and curiosity instead of step-by-step rules. It’s about following the spark, not the syllabus. Trust your gut.
When you vibe code a game, you’re not starting with an instruction manual or a blueprint. You’re starting with a feeling. Maybe you want something fast and electric. Maybe you want to feel momentum, danger, rhythm. That feeling is the compass. The rest comes one prompt at a time.
You don’t need to know every line of syntax to build something cool. You just need to start small, stay curious, and iterate your way toward something that feels right. That’s the entire trick.
⚡ Step 1: The Spark
Every good game starts as a single, vivid idea.
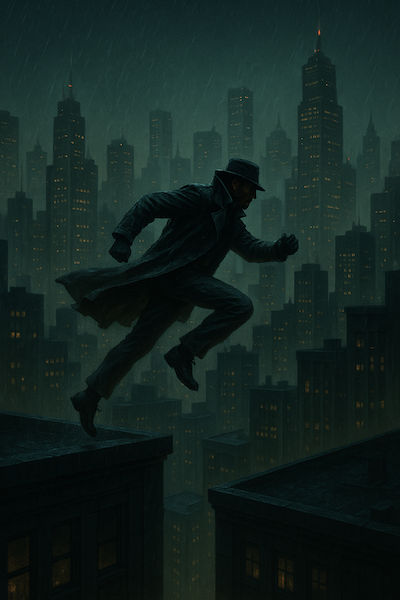
Something like, “What if you were sprinting across glowing rooftops in a neon city and time slowed down every time you fell?”
That’s the spark. It’s not a design document, it’s not a feature list, it’s just the seed of a feeling.
The magic of vibe coding is that you don’t have to know what it’ll become. You just need to build one tiny piece of that spark. Maybe that’s a box that jumps. Maybe it’s a moving skyline. You follow the feeling, and let curiosity handle the rest. You iterate each step, modify element piece by piece. Eventually you get the full picture.
A simple starting prompt
Create a full-screen HTML canvas with a rectangle that falls with gravity and jumps when I press space or tap the screen. Cap the frame rate at 60fps and use requestAnimationFrame.
When that little block jumps for the first time, you’ll get it. It’s the moment where the code stops being logic and starts being alive.
Step 2: The Prompt Loop
Vibe coding is a rhythm between you and the machine. You prompt, you test, you feel. Then you do it again.
Instead of asking for everything at once, you write micro-prompts. One small, specific improvement at a time. You don’t say “build me a whole game.” You say “add a skyline that scrolls slower than the rooftops.” You say “make the jump feel more floaty.” Each one adds a new layer, and together they form something greater than the sum of their parts.
Iteration becomes play. You feel the response, you adjust, and suddenly you’re not coding anymore. You’re tuning a vibe.
Example micro-prompts
- “Add a skyline in the background that scrolls slower than the rooftops.”
- “Make the player jump higher if I hold space.”
- “Add a score in meters that increases rapidly.”
- “Give the player a glowing trail.”
- “Add a 3-second runway at the start with no gaps.”
Every one of these seems small, but over time they compound into something you could never have planned from the start.
Step 3: Think Like a Game Designer (Before You Code)
Good game design isn’t about graphics or code. It’s about feel.
Before you even touch the keyboard, ask yourself a few grounding questions:
- What’s the player actually doing, moment to moment?
- What’s the emotional goal — tension, flow, triumph?
- What happens in the first 10 seconds that makes someone want to keep playing?
Thinking this way helps you build toward moments, not just mechanics. Maybe that first jump is about teaching rhythm. Maybe the slow motion is about relief. Maybe the glow is about power. These small emotional hooks make a game memorable.
You don’t have to know all the answers, but knowing what you want to feel gives you a direction.
Step 4: Write a Tiny PRD
A PRD - Product Requirements Document — sounds overly corporate, but in vibe coding it’s just a short roadmap that keeps you from losing the thread. Think of it like a creative compass you can glance at whenever you feel lost.
Example mini-PRD
Game: Jump Protocol Core Loop: Run across rooftops, jump gaps, and wall-jump back from near-death. Aesthetic: Matrix meets vaporwave — neon glow, dark city, cyber rain. Core Mechanics: • Tap to jump, hold to jump higher • Wall-jump and “rescue slow-mo” if you fall between buildings Scoring: Distance in meters, rising rapidly Success: Feels cinematic and playable on mobile Out of Scope: Sound, menus, advanced physics
This is all you need — a few lines that remind you what you’re building and why. It keeps the creative chaos from turning into confusion.
Step 5: Build, Break, Iterate
Now comes the fun part. You start to build. Things break. You fix them. You feel it. You adjust.
Your player starts as a block. Then you prompt for arms and legs that move. The rooftops are rectangles, until you prompt for layered silhouettes and flickering windows. The background is flat… until you prompt for parallax layers that move at different speeds.
It’s all just layers of iteration. The first version doesn’t have to be fun, it just has to exist. Once it exists, you can make it fun. You can’t vibe with something that doesn’t exist yet.
Every save button click is an opportunity to ask, “What if I made this 5% better?”
Step 6: Refine Your Design (and Ask “What If”)
Iteration is the secret to all good creative work. You get one small piece working, then you ask what would make it better.
- What if time slowed down when you were about to fall?
- What if you could jump off the walls to save yourself?
- What if the skyline changed color as you got farther?
- What if the distance counter screamed upward at a thousand meters a second?
Every “what if” adds energy to your project. You stop chasing “perfect” and start chasing interesting. And that’s where games come alive — not in the plan, but in the curiosity.
Step 7: Little Changes, Big Feels
The smallest details will transform your game.
A slightly softer gravity makes the jump feel smoother.
A faint glow on the rooftops makes the city feel alive.
A fast-rising score makes the player feel powerful.
A subtle 2-second slow motion turns failure into a cinematic escape.
These tweaks are the difference between a prototype and a vibe. You’ll feel it when it clicks — that moment where all the small improvements start adding up, and suddenly it just feels right.
That’s when you realize: you didn’t just code a game. You tuned an experience.
Step 8: Embrace the Loop
You’ll never be “done,” and that’s the best part.
Every time you come back, you’ll see a tiny thing you can polish. You’ll add one new visual touch, adjust a variable, or refactor a messy line. Over time, the game becomes more alive — not because you added more stuff, but because you listened to it.
That’s the heart of vibe coding: it’s a conversation. You build, the code responds, and together you find the flow. You’re not just writing instructions; you’re shaping energy.
Final Thought
Vibe coding isn’t about perfection, it’s about motion.
It’s about building something real, learning through feel, and letting curiosity lead the way.
You don’t need a big studio or a degree to make something amazing. You just need to start with one spark, one prompt, and one jump. Then keep going.
Because little changes, one after another, over time, are how every great game, every creative project, and every idea becomes something truly alive.
“Vibe coding is curiosity in motion. Each tiny improvement compounds until one day, you realize you’ve built something magical.”
Play the Game ↗{.text-accent}